Creating a vintage dress from Butterick pattern 6796 takes about 15 to 20 hours of sewing time for an intermediate seamstress, and the result is a timeless piece that honors both craftsmanship and sustainable fashion. This particular pattern, originally released in the mid-20th century, features elegant lines and construction techniques that differ significantly from modern commercial patterns, which means you’ll need to approach sizing, terminology, and assembly methods with a different mindset than you might bring to contemporary projects.
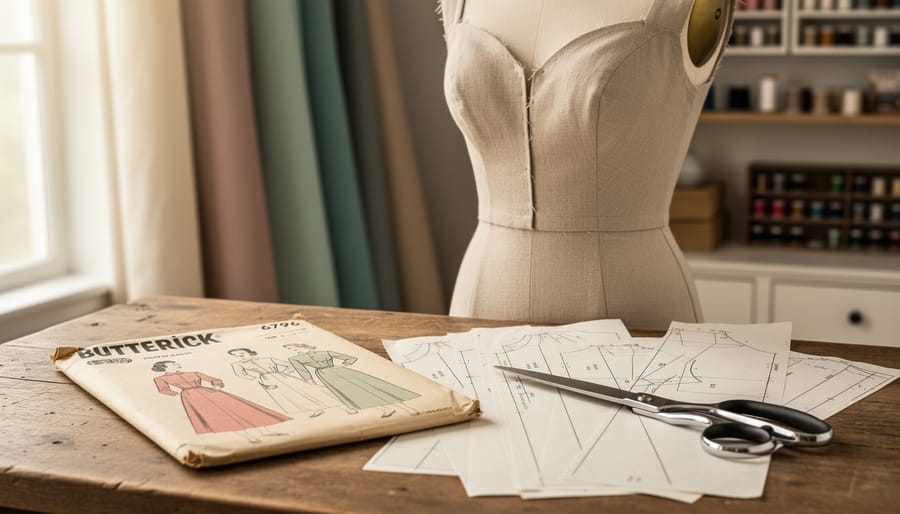
I stumbled upon pattern 6796 at a church basement sale three years ago, tucked between a stack of cookbooks and embroidered tea towels. The envelope was worn soft at the edges, but the tissue inside was pristine. That discovery reignited my love of fabric and reminded me why vintage patterns remain treasure troves for sewists who value quality construction and distinctive silhouettes you simply can’t find in modern pattern catalogs.
Working with vintage Butterick patterns requires understanding their unique quirks. Sizing runs smaller than today’s standards, often by two or even three sizes. The instructions assume a higher baseline of sewing knowledge, skipping steps that modern patterns spell out in detail. Seam allowances, pressing techniques, and even the order of construction can surprise you if you’re accustomed to contemporary methods.
This guide walks you through every stage of completing pattern 6796, from decoding the envelope measurements and selecting appropriate fabric from Canadian suppliers to mastering vintage finishing techniques that give your dress professional results and lasting durability.
What You’ll Need: Tools and Materials for Butterick 6796
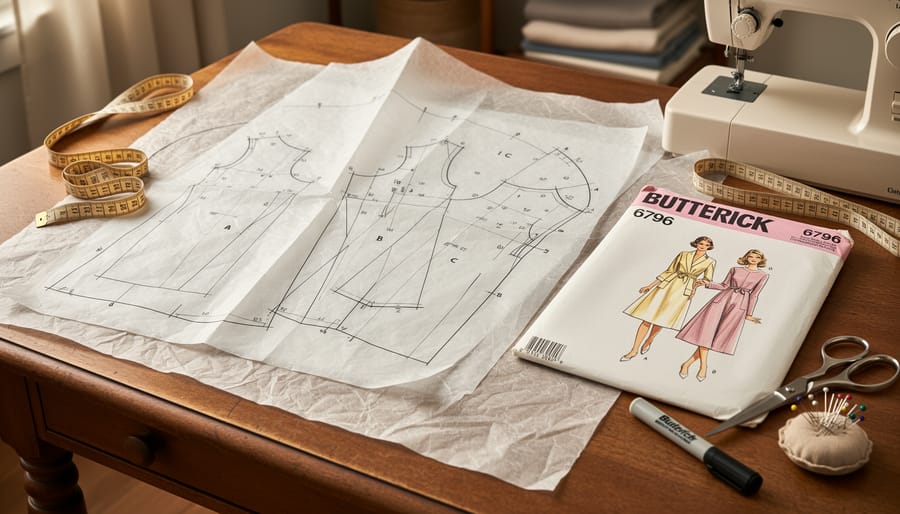
Gathering the right materials before you start will save you hours of frustration and ensure your vintage Butterick 6796 dress turns out beautifully. I learned this the hard way on my first vintage project, when I had to pause mid-construction to hunt for proper interfacing at three different fabric stores.
The pattern envelope lists yardage requirements that vary by size, typically ranging from 3¼ to 4½ yards for the main fabric depending on width and your chosen view. For this 1950s silhouette, you want fabric with enough body to hold the structured bodice but enough drape for the skirt. Cotton sateen, lightweight wool crepe, or quality cotton poplin work beautifully. I’ve had great success sourcing these from Blackbird Fabrics in Vancouver or The Workroom in Toronto, both of which carry excellent mid-weight cottons that honor vintage aesthetics while being machine washable. A crisp cotton lawn or broadcloth creates that authentic 1950s look, though you can substitute modern cotton blends if you prefer easier care.
Here’s what you’ll need to complete this pattern:
- Main fabric: 3¼ to 4½ yards based on your size and fabric width (45″ or 60″)
- Lightweight interfacing: ½ yard for bodice stability and facings
- One 7″ or 9″ zipper (metal zippers give the most authentic vintage look)
- Matching thread in quality cotton or polyester
- Pattern tracing paper or medical exam table paper for preserving the original tissue
- Pattern weights or pins suitable for delicate tissue
- Fabric marking tools: tailor’s chalk, water-soluble marker, or tracing wheel with carbon paper
- Sharp fabric shears (reserve these for fabric only)
- Hand-sewing needles for basting and finishing
- Seam ripper (you’ll likely need it)
- Pressing cloth to protect vintage-style fabrics
- Muslin or similar test fabric: 2 yards for making a fitting sample
Don’t skimp on interfacing quality. The vintage pattern calls for “lightweight interfacing,” which in 1950s terms meant a woven material, not modern fusibles. I prefer a quality fusible interfacing like Pellon SF101 for convenience, but if you want absolute period accuracy, look for silk organza or cotton batiste that you’ll hand-baste in place.
The pattern weights deserve special mention. Vintage tissue patterns tear easily, and pinning through them repeatedly causes damage. Invest in proper pattern weights, or make your own by filling small fabric pouches with rice or sand. Your future self will thank you when you want to use this pattern again in five years and it’s still intact.
Before You Begin: Pattern Prep and Important Considerations
Before you cut a single piece of fabric, invest time in understanding your vintage Butterick 6796 pattern. This preparatory phase is where most vintage sewing projects succeed or fail, and rushing through it almost guarantees disappointment later.
First, confront the sizing reality head-on. Vintage Butterick patterns from the 1950s typically run two to four sizes smaller than modern commercial patterns. A vintage size 14 often corresponds to a modern size 6 or 8. This isn’t about vanity sizing or body image; it reflects genuine shifts in sizing standards over seven decades.
To measure yourself accurately for vintage patterns, you need your high bust (directly under your arms, above the bust), full bust, natural waist (the smallest part, not where your jeans sit), and hips at the fullest point. Compare these measurements to the pattern’s finished garment measurements, not just the body measurements. Pattern 6796 includes ease built into the design, but understanding how much helps you choose the right size.
When it comes to the pattern tissue itself, treat it gently. After sixty or seventy years, that paper has become brittle and tears easily at the folds. I learned this the hard way with my first vintage pattern when an irreplaceable sleeve piece tore along a crucial seam line. Your best option is to trace the pattern onto Swedish tracing paper or medical exam table paper, preserving the original entirely. If you must work directly from the tissue, unfold it slowly and consider reinforcing vulnerable edges with clear tape before cutting.
Reading the entire instruction sheet before you begin is non-negotiable. Vintage patterns use different terminology than modern ones (selvage instead of selvedge, bias binding techniques we rarely see today), and construction order sometimes differs from contemporary methods. I spend at least thirty minutes studying the instructions, marking any confusing steps to research beforehand.
Finally, make a muslin test garment. Use inexpensive cotton that drapes similarly to your fashion fabric, and sew the major seams to check fit. This step reveals whether you need a full bust adjustment, need to lower the waistline, or should blend between sizes. The few hours spent on a muslin will save you from ruining good fabric and struggling with unfixable fit issues.
Safety Warnings and Common Pitfalls
Working with vintage patterns requires extra care because you’re handling irreplaceable materials and often working with techniques unfamiliar to modern sewers. I learned this the hard way when I tore a corner of my grandmother’s original 1950s pattern while rushing through prep work.
Handle your vintage tissue pattern as if it’s archival material, because it is. The paper becomes brittle with age, so avoid folding and refolding along original creases. Instead, trace your size onto Swedish tracing paper or medical exam paper, preserving the original for future projects. When you do need to handle the tissue, support it fully rather than letting sections dangle and tear under their own weight.
Rotary cutters deserve serious respect throughout your pattern-to-finish process. Keep the blade guard closed when not actively cutting, and always cut away from your body. I keep a cutting mat dedicated to fabric work, replacing it when the surface shows wear that could catch your blade.
Beyond tool safety, certain mistakes will sabotage your project before you finish the first seam. Skipping the muslin fitting is the most common disaster with vintage patterns, given the dramatic sizing differences. You might think you’re saving time, but cutting into your fashion fabric without testing the fit first almost guarantees wasted material and frustration. Similarly, ignoring grain lines because “it probably doesn’t matter” will result in a dress that twists on your body and hangs awkwardly.
Rushing seam finishes might seem acceptable when you’re eager to see results, but raw edges fray with wear and washing. French seams or properly finished edges make the difference between a dress that lasts one season and one you’ll treasure for years. These pressing techniques and interfacing tips require patience, but they’re what separate homemade from handmade.
Step-by-Step: Sewing Your Butterick 6796 Dress
Cutting and Marking Your Fabric
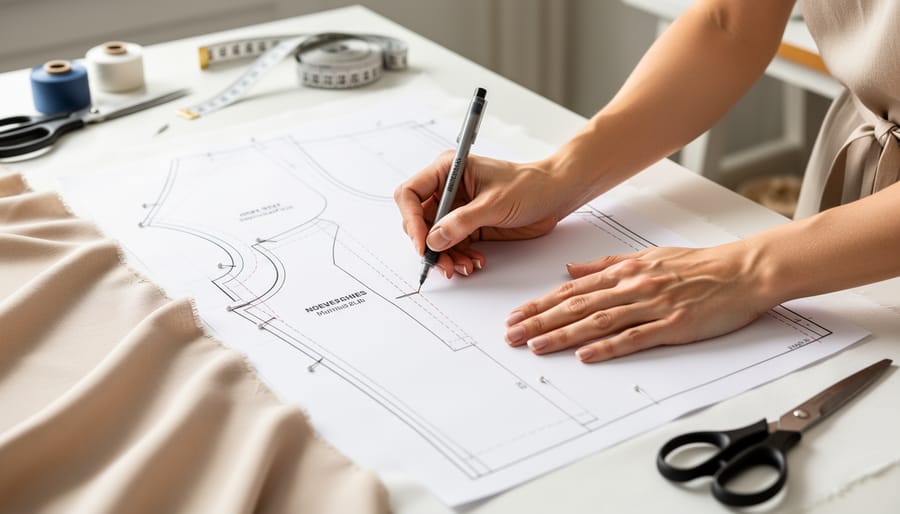
Proper cutting and marking can make or break your vintage dress project. Start by preparing your fabric: press out any wrinkles with a steam iron, then fold it lengthwise with selvages together, right sides facing in. This creates a stable cutting surface and ensures symmetrical pieces.
Study your pattern layout guide carefully. Vintage Butterick patterns typically include multiple layouts for different fabric widths, choose the one matching your material. Pattern pieces marked “place on fold” go directly on the fabric’s folded edge. All other pieces align according to the grain line arrow, which should run parallel to the selvage. I keep a clear ruler handy to measure from selvage to both ends of the arrow, ensuring perfect alignment before pinning.
Pin pattern pieces to fabric using enough pins to prevent shifting, but not so many that you distort the tissue. Place pins within seam allowances pointing toward cutting lines. Cut carefully with sharp fabric shears, using long, smooth strokes. Never lift fabric off your cutting surface.
Transfer all markings immediately after cutting each piece. For darts and construction lines, use tailor’s chalk or a tracing wheel with dressmaker’s carbon. Mark notches with small snips into the seam allowance, no more than 1/8 inch deep. Clip through both fabric layers simultaneously to ensure matching pieces align perfectly during assembly. Dots indicate pivot points; mark these with chalk or a fabric marker on the wrong side.
Label each piece with masking tape noting the pattern number, especially if you’re cutting multiple sizes.
Bodice Construction
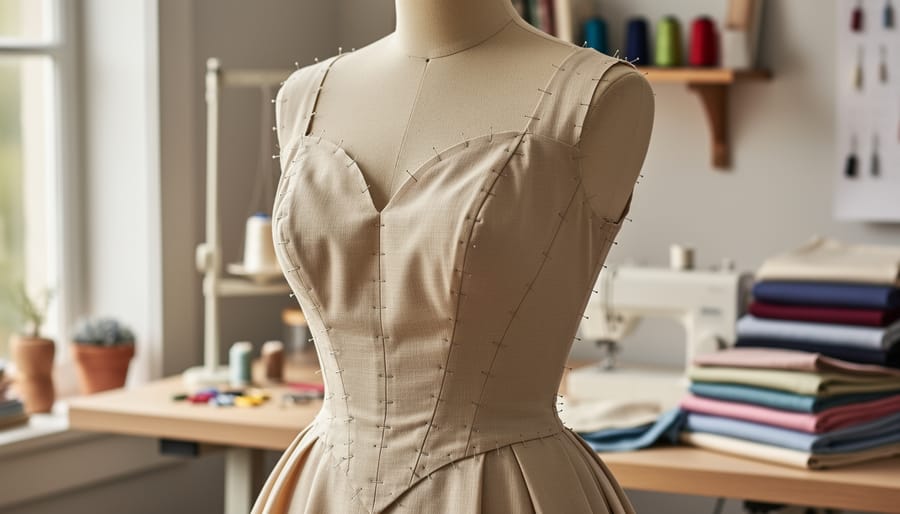
I still remember the first time I sewed a fitted bodice from a vintage pattern, the moment those darts came together and created that gorgeous 1950s shape felt like magic. Pattern 6796’s bodice construction showcases classic couture techniques that modern patterns often simplify away.
Start with your darts, as they’re the foundation of that enviable fitted silhouette. Pin each dart carefully, matching your marked lines precisely. Sew from the wide end toward the point, gradually tapering off the fabric edge rather than backstitching at the tip. This prevents little bumps that show through on the right side. Press bust darts downward and waist darts toward the centre front, vintage patterns rely on proper pressing to create structure.
Next, apply your interfacing to the bodice facing pieces. Most vintage patterns specify lightweight woven interfacing, which I source from Fabricland or local Toronto shops that carry Pellon products. Baste the interfacing to the wrong side of your facing pieces just inside the seam allowance.
Now join your shoulder seams. Pin the front and back bodice pieces right sides together at the shoulders, matching notches. Stitch at the specified seam allowance (usually 5/8″), then press seams open. This is critical, vintage construction depends on crisp, open seams to reduce bulk under that fitted silhouette.
Move to the side seams, pinning carefully to match any waist markings. Sew from armhole to hem in one continuous line. Press these seams open as well, using a tailor’s ham if you have one to maintain the bodice’s gentle curves. The fitted shape should already be emerging, if it looks boxy, double-check that your darts are pressed correctly.
Skirt Assembly and Joining to Bodice
With your bodice complete, you’re ready to tackle the skirt, often my favorite part because you finally see the dress silhouette take shape.
Start by staying all skirt seams (side seams, center back if applicable) according to your pattern markings. Press seams open as you go; this step becomes nearly impossible once the skirt is attached. If your pattern includes pleats, carefully match the pattern markings and baste them in place before stitching. For gathered styles, run two parallel rows of long machine stitches within the seam allowance along the waistline edge, leaving long thread tails. Gently pull the bobbin threads while distributing the gathers evenly until the skirt matches the bodice waist measurement.
Before joining, double-check that both pieces are right side out and that the skirt’s center back aligns with the bodice center back. Pin the waistline seam carefully, matching all notches, side seams, and center points. I learned the hard way that rushing this step creates puckering you’ll notice forever.
Stitch the waistline seam with the gathered or pleated side up so you can control the fabric layers. Grade this seam by trimming the bodice seam allowance slightly narrower than the skirt side, it reduces bulk and helps the waistline lie flat. Press the seam allowances toward the bodice, working from the wrong side to avoid flattening gathers or pleats.
Inserting the Zipper and Finishing Details
With your bodice and skirt assembled, it’s time to tackle the zipper, arguably the most intimidating step for many sewers, but absolutely manageable with patience. Butterick 6796 typically calls for a side or back zipper, and I always use an invisible zipper for this pattern because it disappears beautifully into the seam and honors that clean 1950s silhouette.
Before inserting your zipper, finish the seam allowances where it will sit. I press my zipper seam open first, then baste it closed exactly where the zipper will go. This creates a roadmap. If you’re using a regular zipper rather than invisible, consider a lapped application, it looks period-appropriate and hides the teeth elegantly.
Here’s my couture trick: hand-pick the zipper from the right side after machine stitching. Those tiny backstitches along the seam create a professional finish that ready-to-wear garments can’t match. Use thread that matches your fabric exactly, and keep your stitches small and even, about a quarter-inch from the seam line.
For facings, interface them before attachment (you did this during prep, right?). Understitch the facing to the seam allowance after attaching it, this single step prevents facings from rolling out and showing. Press thoroughly, then secure facings at the shoulder seams with a few hand stitches to keep everything anchored.
Finish all interior seams now. For this vintage cotton or taffeta, I prefer French seams or bias-bound edges. They’re durable and look beautiful if anyone peeks inside your dress.
Finally, hem with care. Mark your hem length while wearing the dress with appropriate undergarments and shoes. Press up, finish the raw edge, and hand-stitch using a blind hem stitch for complete invisibility from the outside.
Final Pressing and Finishing Touches
Pressing transforms a homemade garment into something truly professional. With your Butterick 6796 nearly complete, proper finishing will make all the difference.
Start by setting your iron to the appropriate temperature for your fabric, vintage patterns often suggest natural fibers that can handle higher heat, but always test on a scrap first. Press each seam from the wrong side, using a pressing cloth to protect delicate fabrics and prevent shine. Work methodically: press darts toward the center, seams open unless the pattern specifies otherwise, and give special attention to the waistline seam where bodice meets skirt.
Don’t drag the iron, lift and press in sections to avoid stretching bias-cut areas. Steam is your friend for setting crisp edges on facings and hems, but avoid over-pressing pleats or gathers that should maintain soft volume.
Now’s the time for those final details. If you’re adding decorative buttons beyond the functional zipper, mark their placement carefully and hand-sew them securely. Consider a fabric-covered belt if your pattern includes one, it’s worth the extra effort for that authentic 1950s polish.
Do a thorough quality check: inspect all seams for loose threads, ensure your hem is even all around, and verify that the zipper glides smoothly. Try on your finished dress one last time, checking the hang and drape. Any puckers or pulls? A touch more pressing usually resolves them.
You’ve just created something timelessly beautiful.
Verification and Next Steps: Ensuring a Perfect Fit
Once you’ve completed the final pressing, put the dress on right-side-out in front of a full-length mirror. Check that the shoulder seams sit at the edge of your shoulders (not drooping down your arms), the bust darts point toward the apex of your bust without pulling, and the waistline sits at your natural waist. The zipper should lie flat without puckering, and you should be able to move your arms comfortably. If the bodice feels tight across the shoulders, you’ve likely encountered the most common vintage pattern challenge: the narrower shoulder width typical of 1950s drafting. This requires letting out the shoulder seams if you have seam allowance, or adding a small gusset under the arm.
For bust adjustments, if the bodice pulls across the chest or the darts don’t align with your bust apex, you may need to redraft the darts or add a full bust adjustment. I learned this the hard way early in my sewing journey when I ignored a tight bust on a muslin and ended up with an unhelpful dress. With vintage patterns, the waist often sits higher than modern patterns expect, so verify the waistline seam hits your natural waist when standing relaxed. If it’s too high, you can lower it by unpicking the seam and resewing with the bodice shifted down slightly, though this affects the overall proportions.
For hemming issues, put on the shoes you’ll wear with the dress and have someone mark an even hemline with pins or chalk while you stand still. An uneven hem is usually caused by fabric grain issues during cutting rather than poor sewing. Minor pulling at seams often resolves with steam pressing, but if seams are stressed or the fabric distorts when you sit, the garment is too small and needs letting out.
After confirming the fit, care for your Butterick 6796 dress according to your fabric choice. Cotton and linen vintage dresses can be washed gently, while silk or rayon may require dry cleaning. Store the dress on a padded hanger to maintain the shoulder shape. Document your finished dress with photos in natural light, noting any pattern adjustments you made for future reference. The skills you’ve developed with this pattern transfer beautifully to other vintage Butterick designs from the same era, particularly patterns 6582 through 6850, which share similar construction methods and fitting approaches.
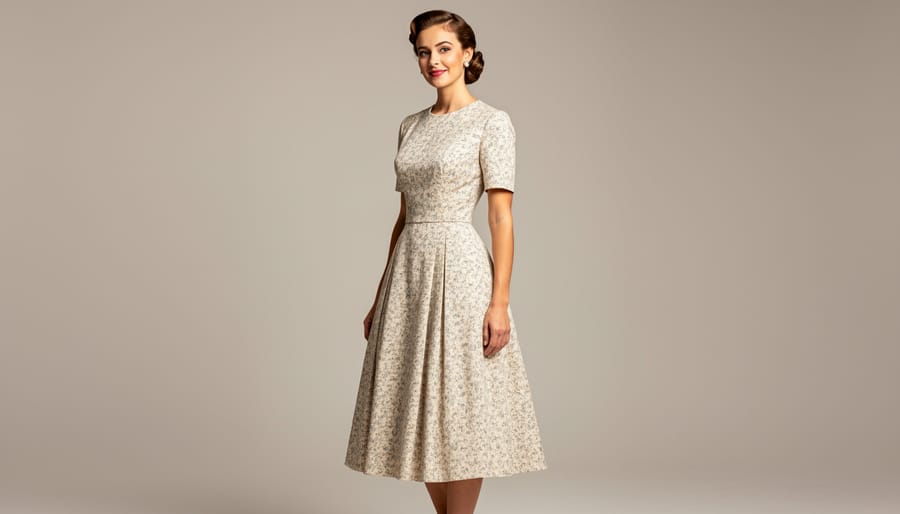
Common Questions About Sewing Vintage Butterick Patterns
Working with vintage patterns brings up questions that modern patterns don’t address, and I’ve heard many of them from readers tackling their first Butterick pattern. These answers should clear up the confusion and help you approach pattern 6796 with confidence.
Why does my usual size not match the vintage pattern size?
Vintage sizing ran smaller than modern ready-to-wear, so you’ll typically need a pattern 2-4 sizes larger than your current clothing size. Always measure your bust, waist, and hips and compare to the measurements printed on the pattern envelope rather than going by the size number.
Can I modify Butterick 6796 if I want a different neckline or sleeve length?
Yes, you can modify most elements once you understand the pattern’s construction. Changing sleeve length is straightforward, but altering necklines requires adjusting facing pieces to match. Make these changes on your muslin first to verify they work before cutting your fashion fabric.
What if the recommended fabric from 1950 isn’t available anymore?
Choose modern fabrics with similar weight and drape to the original recommendations. For Butterick 6796, medium-weight cotton, linen, or cotton blends work beautifully where the pattern calls for cotton, and you can substitute rayon challis for vintage rayon.
Where can I find authentic vintage Butterick patterns in Canada?
Check local estate sales, antique shops, and online marketplaces like Etsy or eBay where Canadian sellers often ship domestically. Vintage sewing groups on social media also facilitate pattern swaps and sales within Canada, saving on international shipping costs.
One concern that comes up repeatedly involves pattern pieces that seem incomplete or confusing compared to modern instructions. Vintage patterns assumed more sewing knowledge, so they skip steps that seem obvious to experienced sewers but baffle beginners. The bodice front, for instance, might not explicitly tell you to stay-stitch the neckline, because that was considered basic knowledge in 1950. When instructions feel sparse, consult a general vintage sewing guide or ask in online communities where experienced sewers share techniques.
The tissue paper itself worries people since vintage patterns tear easily and you can’t just download another copy. I’ve found that tracing the pattern onto Swedish tracing paper or medical exam paper preserves the original while giving you a sturdier working copy. You can also scan or photograph each piece as a backup before you start cutting. This lets you use the pattern multiple times or make different sizes without anxiety about damaging an irreplaceable piece of sewing history.
If your first attempt doesn’t fit perfectly, remember that fitting vintage patterns is a skill that improves with practice. Each pattern you complete teaches you more about how vintage sizing and construction translate to your body, making the next project easier.
Completing your Butterick 6796 dress is genuinely rewarding. You’ve not only created a wearable piece of fashion history but also developed skills that’ll serve you in every future sewing project. The precision vintage patterns demand makes you a better sewist, plain and simple.
I still remember the first time I finished a vintage Butterick pattern. The fit was different from anything I’d made before, more structured, more intentional. That dress hung in my closet like a trophy. Yours deserves the same pride.
What keeps vintage patterns like 6796 relevant in 2026 isn’t nostalgia. It’s the combination of timeless design and the sustainability they represent. Every vintage make is one less item contributing to fast fashion waste. You’re choosing quality construction, thoughtful fabric selection, and a garment that’ll last years instead of months. That matters more now than ever.
The learning curve with vintage patterns can feel steep initially. You might’ve unpicked a few seams or puzzled over unfamiliar instructions. That’s normal. Those challenges make you resourceful and patient, qualities every skilled sewist needs.
I’d love to see what you created. Share your finished Butterick 6796 on social media or join Canadian sewing communities where makers celebrate these projects together. Your experience, the triumphs and the tricky bits, will inspire someone else to try their first vintage pattern. That’s how we keep these beautiful designs alive.