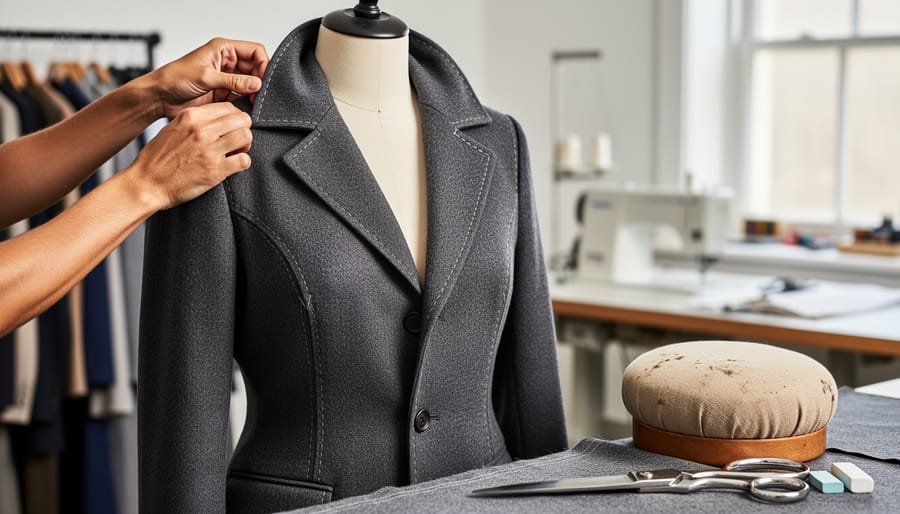
Creating a tailored wool coat from a Burda pattern takes approximately 15 to 25 hours spread across several sessions, depending on your experience and the complexity of the design you choose. The process follows five core stages: pattern selection and sizing, fabric preparation and cutting, interfacing and stabilization, precision stitching of structural seams, and finishing details like hems and buttonholes. What sets Burda patterns apart is their European sizing and minimal seam allowances, typically 1.5 cm rather than the North American standard 5/8 inch, so you’ll need to pay close attention during prep work to avoid sizing mishaps.
I still remember the first time I tackled a Burda coat pattern back when I was living in Toronto. I chose a classic A-line silhouette in deep charcoal wool from a local supplier on Queen Street West. The instructions felt sparse compared to the Big Four pattern companies, but that minimalism taught me to read garment construction more carefully. Canadian sewists have an advantage here: our climate demands serious outerwear, and investing the time to build a coat means you’re creating something that will genuinely protect you through harsh winters while expressing your personal style.
This guide walks you through every decision and technique required to transform Burda’s technical drafting into a finished coat. You’ll learn which tools make the difference between frustration and precision, how to handle wool’s unique properties, and the exact sequence of construction steps that professional seamstresses follow. Whether you’re working with boiled wool from a Canadian mill or a luxurious wool blend, these methods ensure your finished garment fits beautifully and lasts for years.
What You’ll Need: Tools, Materials, and Fabric Sourcing
Choosing Your Burda Pattern
Starting with the right pattern makes all the difference in your coat-sewing journey. Burda offers dozens of coat styles, from classic tailored trenches to modern cocoon shapes, but not every pattern suits every sewist or body type.
If you’re new to coat construction, look for patterns labeled “easy” or with fewer pattern pieces, think simple A-line coats without complicated collars or in-seam pockets. Burda Style 6408 is a fantastic beginner option with clean lines and straightforward construction. Intermediate sewists can tackle patterns with set-in sleeves, shawl collars, or welt pockets, while advanced stitchers might choose double-breasted styles with full linings and bound buttonholes.
For body shape considerations, check the line drawings carefully. If you have broad shoulders, avoid exaggerated shoulder details. Petite frames shine in shorter lengths with minimal bulk, while taller sewists can carry off dramatic collar treatments and longer hemlines beautifully.
Always read the technical difficulty rating and review the construction techniques listed on the pattern envelope before committing. I learned this the hard way with an advanced pattern that had seventeen pieces per sleeve, definitely not beginner territory!
Selecting the Perfect Wool Fabric
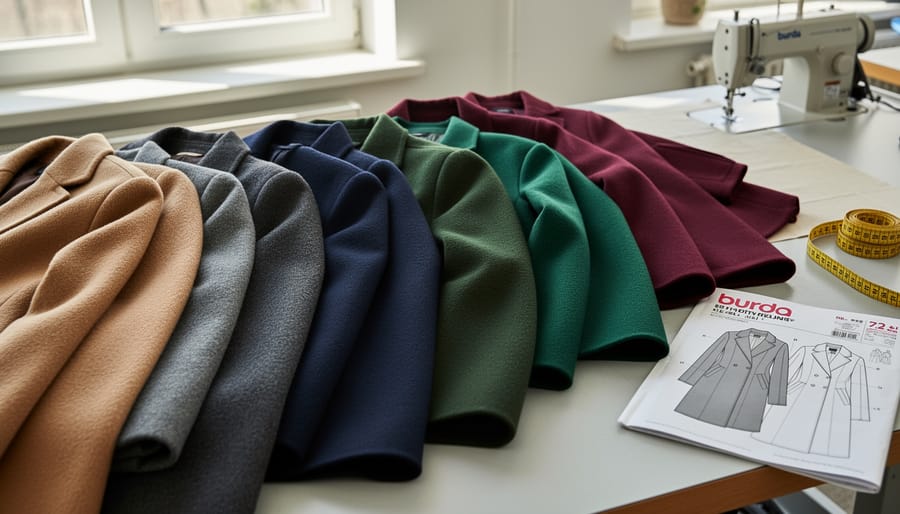
Wool choice makes or breaks a coat project. You want fabric that holds its shape, provides warmth, and sews beautifully without excessive fraying or shifting under your needle.
Melton wool is my top recommendation for beginners. This felted, tightly woven fabric doesn’t fray, cuts like butter, and creates structured coats that look professional. It’s heavier, so it works best for straight or A-line silhouettes rather than designs with lots of drape.
Boiled wool offers similar ease, it’s been fulled and shrunk during manufacturing, so edges stay put without finishing. Perfect if your pattern includes curved seams or you’re skipping a lining. The texture adds visual interest, though it’s bulkier in places like sleeve caps.
Wool coating (sometimes called coating weight wool) gives you more variety in drape and texture. These 14-18 oz fabrics come in tweeds, herringbones, and plain weaves. They require French seams or bound edges since they do fray, but the effort pays off in a refined finish.
For Canadian sourcing, I’ve had great success at Blackbird Fabrics in Vancouver and Urban Purl in Toronto, both carry quality wool yardage and can advise on meterage for your pattern. ships to Canada with reasonable duties. If sustainability matters to you (and it should), look for deadstock wool or remnants from garment factories. These rescue perfectly good fabric while cutting costs. Just verify you’ve got enough yardage plus 10% for mistakes.
Before You Begin: Essential Prep Work and Safety Notes
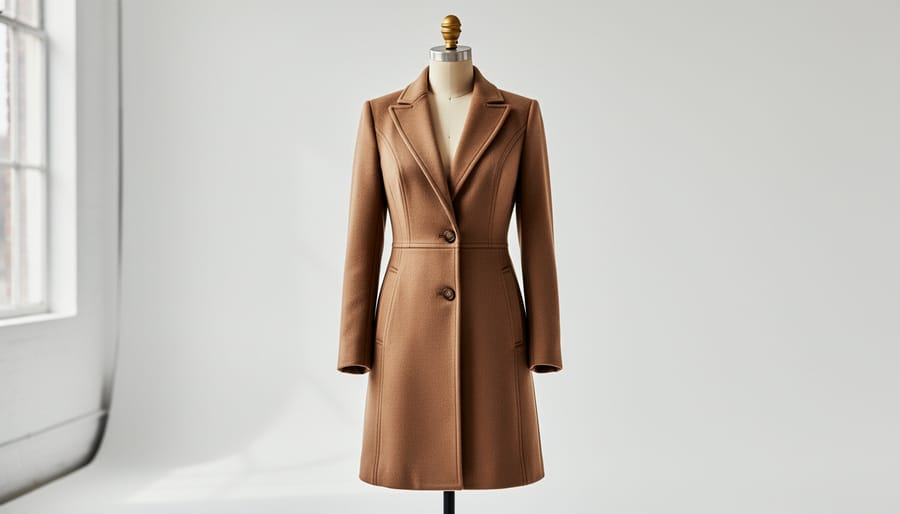
Before you cut into that gorgeous wool yardage, pause for some crucial preparation that will make or break your coat. I learned this the hard way on my first Burda coat when I skipped the pattern sizing step and ended up with sleeves I could barely bend my arms in.
Start by measuring yourself accurately and comparing those measurements to Burda’s size chart, not the size printed on ready-to-wear clothing. Burda patterns often run smaller than North American sizing, so you might need to grade between sizes or add ease. Trace your pattern pieces onto Swedish tracing paper or medical exam paper rather than cutting the original sheets, preserving them for future projects or alterations.
Next, pre-treat your wool fabric exactly as you plan to care for the finished coat. Most wool coating benefits from steam pressing or dry cleaning before cutting to prevent shrinkage later. Lay your fabric flat for 24 hours after steaming to let it relax and regain its shape. Check for any flaws or weak spots in the weave and plan your pattern layout to avoid them.
Your workspace matters more than you might think when handling bulky wool and large pattern pieces. Clear a sturdy table that can support the weight of heavy fabric without sagging, and ensure you have adequate lighting from multiple angles to catch construction details. Keep your iron and pressing surface within easy reach but positioned where you won’t accidentally brush against a hot surface while cutting or pinning.
Finally, gather all your notions and tools before you start. There’s nothing worse than discovering mid-seam that you’re short on interfacing or that your machine needle is too dull for dense wool. Check your pattern instructions for specific requirements and have backups of essential items like needles and thread.
Step-by-Step: Sewing Your Burda Wool Coat
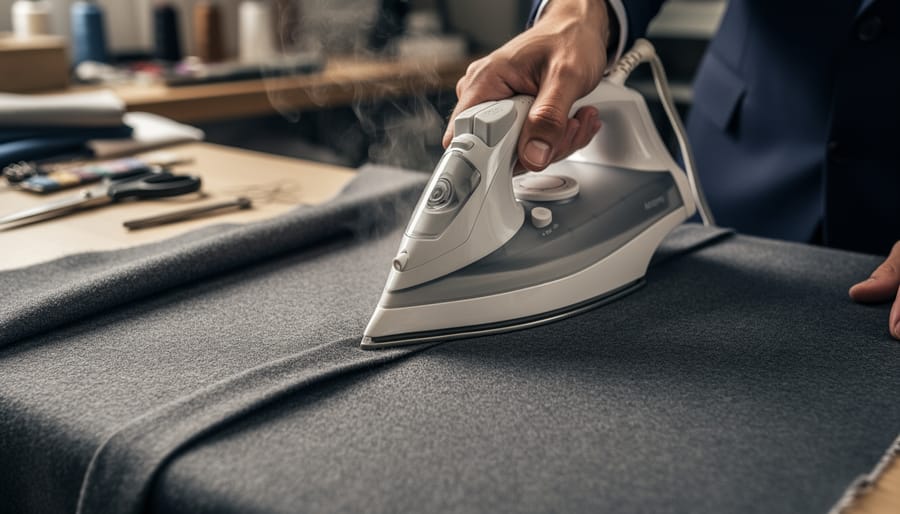
Preparing and Cutting Your Pattern
Start by spreading your Burda pattern sheet on a large, flat surface, a clean floor or dining table works well. Unlike pre-cut tissue patterns, Burda sheets require tracing. Use Swedish tracing paper or medical exam paper to trace your size line in pencil first, then marker. Label each piece with its number, name, and any grainline arrows before cutting out your traced pattern.
Check your coat pattern for adjustment needs before cutting fabric. Compare key measurements, shoulder width, sleeve length, back length, against your body. Burda patterns run true to European sizing, which can differ from North American brands. Make any length or width adjustments now on your traced pattern pieces, blending changes smoothly into the original lines.
Prepare your fabric by pressing out any creases with a warm iron. Fold your wool right sides together, aligning selvages carefully. Because wool often has a directional nap or subtle sheen, run your hand over the surface, it should feel smooth in one direction. All pattern pieces must be laid with their tops pointing the same direction on napped fabric.
Start pattern layout with the largest pieces first. Position them on the fold or straight grain as marked, using weights rather than pins that can leave marks in wool. For plaids or stripes, match patterns at center back, side seams, and sleeve notches, this takes extra fabric but creates a polished result. Once satisfied with your layout, cut carefully with sharp shears, using long, smooth strokes.
Constructing the Body and Shoulders
Start by assembling your coat’s main body pieces with the darts and seams that shape the torso. Pin your front and back pieces right sides together at the side seams, matching notches carefully. Burda patterns typically mark construction order with numbers, follow them. Stitch each seam with a 5/8-inch allowance unless your pattern specifies differently, then press seams open over a tailor’s ham to preserve the coat’s curved shape. Don’t skip pressing at this stage; wool “remembers” where you press it, making later steps easier.
For shoulder seams, align the front and back pieces at the shoulder line and stitch. Press these seams open, then consider adding a narrow strip of lightweight stay tape along the shoulder seamline on the wrong side. This prevents stretching under the coat’s weight, especially important with heavier wool coating.
Setting sleeves requires patience. With right sides together, match the sleeve cap’s center notch to the shoulder seam. Pin at the notch, then at the underarm notches, working from both directions to ease any fullness into the cap smoothly. You’ll have slight extra fabric in the cap, this creates the rounded shoulder shape. Don’t gather or pleat it; instead, use your fingers to ease the fabric as you stitch, removing pins just before the needle reaches them.
After attaching sleeves, press the seam allowances toward the sleeve using a sleeve roll. Never press directly on the right side of wool without a press cloth, it’ll create shine marks you can’t remove. Steam lightly and let each pressed area cool completely before moving the fabric. This “sets” your work and prevents puckering.
Adding Structure: Interfacing and Lining
Interfacing transforms a floppy wool panel into a structured coat that holds its shape beautifully. For a wool coat, you’ll need two types: fusible interfacing for areas requiring crispness (front facings, collar, pocket welts, button plackets) and sew-in hair canvas or wigan for the coat front if your pattern calls for chest pieces. Always test your interfacing on fabric scraps first, some wools don’t respond well to fusible products, and nothing’s worse than discovering bubbling after you’ve applied it to your actual pieces.
Cut interfacing slightly smaller than the pattern piece (about 3mm inside all seamlines) to reduce bulk. Apply fusible interfacing with a pressing cloth, using firm pressure and plenty of steam rather than sliding the iron. Let each section cool completely before moving it.
Prepare your lining by assembling it separately according to pattern instructions, leaving the hem unfinished for now. Most Burda patterns have you attach lining at the neckline and front facings first, then drop it into the coat body. Pin carefully at shoulders and armscye, easing any excess. The lining should sit slightly shorter than the coat shell, about 2.5cm shorter at the hem, to prevent pulling and allow movement.
Slipstitch the lining to zipper tape or front facings by hand for an invisible finish. At the sleeve hems, turn under the lining edge and hand-stitch it to the coat sleeve about 2cm above the finished hem, creating a small fold of ease called a jump hem.
Finishing Touches: Collar, Buttonholes, and Hem
The final details transform a handmade coat from homemade to heirloom. These finishing steps require patience, but they’re what people notice first.
Attaching the Collar
Press your completed collar unit thoroughly before pinning it to the neckline. Match centre backs and shoulder seams precisely, then ease any fullness between notches. Baste first, wool’s bulk makes pinning alone unreliable. Stitch slowly, stopping with the needle down to pivot at corners. Grade the seam allowances (trim them to different widths) to reduce bulk, then press toward the collar. Under-stitch the collar facing to keep everything lying flat. Give it a final steam from the wrong side, using a pressing cloth.
Creating Professional Buttonholes
Mark your buttonhole placement carefully with tailor’s chalk, measuring from finished edges, not raw ones. For machine buttonholes, test on scraps first using the same interfacing and layers as your coat front. Reduce presser foot pressure if your machine allows it, heavy wool needs less compression. Cut buttonholes open using a seam ripper or buttonhole chisel, placing a pin at each end as a safety stop.
Bound buttonholes take longer but look spectacular on wool coats. If your pattern includes them, follow Burda’s instructions exactly and practice on test fabric first.
Hemming Heavy Wool
Try on your coat and mark the hem while wearing the shoes you’ll pair with it. Turn up the hem allowance and press lightly. Trim the lining so it hangs ½ inch shorter than the coat hem, this prevents pulling. Catch-stitch or blind-hem the coat edge by hand, taking tiny bites of the outer fabric. Machine hemming shows on wool’s face, even with invisible thread.
Sew buttons on with a thread shank (wind thread several times beneath the button before knotting) so they sit away from the fabric and button smoothly through thick wool.
Checking Your Work: Fitting and Final Adjustments
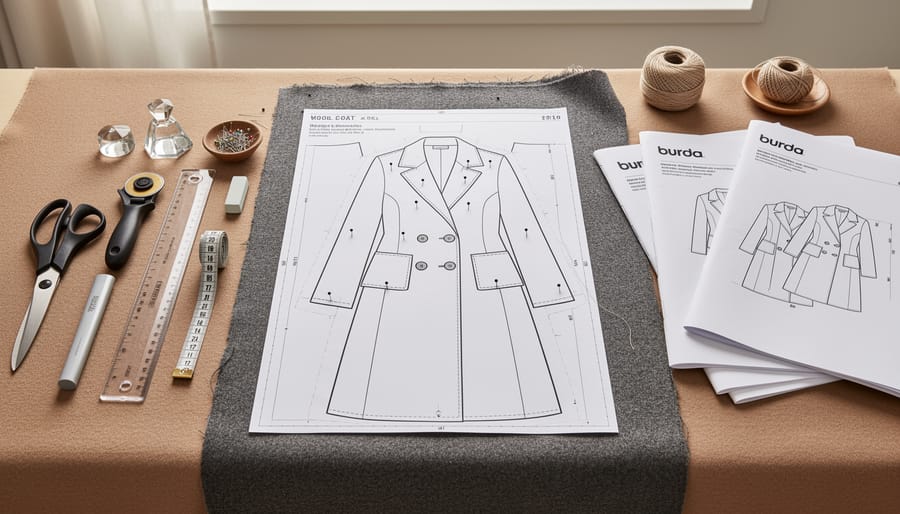
Your coat is complete, or is it? Before declaring victory, you need to systematically check your work to ensure proper fit, construction quality, and that professional finish that makes handmade outerwear truly special.
Start with a thorough fitting session in front of a full-length mirror. Put the coat on and move through natural positions: raise your arms overhead, reach forward, sit down, cross your arms. The coat should move with you without pulling at the shoulders or gaping at the collar. Check that the shoulder seams sit exactly where your natural shoulder ends, the sleeves hang straight without twisting, and the hem falls evenly all around. If you notice any drag lines or stress points, mark them with tailor’s chalk while wearing the coat.
Examine the interior construction with the same critical eye you’d use when shopping for a high-end coat. The lining should hang smoothly without pulling or sagging, seam allowances should be neatly finished (especially visible at the hem and cuffs), and interfacing should provide structure without creating stiffness or bulk. Run your hand along all seams to feel for ridges or uneven pressing.
Common issues at this stage include shoulders that feel tight when you move (often fixed by letting out the sleeve cap slightly), a collar that stands away from the neck (requires re-basting and re-stitching with a slightly deeper seam), or hems that dip on one side (easily corrected by adjusting the hem depth). Don’t rush these adjustments, a day’s work now prevents years of an ill-fitting coat.
Final pressing is what transforms a home-sewn garment into a professional piece. Use a tailor’s ham to press curved seams, a pressing cloth to protect your wool from shine, and plenty of steam. Press every seam from the wrong side first, then lightly from the right side. Pay special attention to the collar roll, lapel edges, and hem, these are the areas people notice first. Let the coat hang on a padded hanger for 24 hours before wearing it; wool needs time to relax and set into its final shape after all that steam and handling.
What’s Next: Caring for Your Handmade Wool Coat
Now that you’ve invested hours into creating your beautiful Burda wool coat, proper care will keep it looking professional for years. I learned this the hard way when my first handmade coat developed moth damage after one careless summer, don’t let that happen to your masterpiece.
Store your coat on a sturdy wooden hanger with shaped shoulders to maintain its structure. Before putting it away for the season, brush it thoroughly with a garment brush to remove surface dirt and lint. Cedar blocks or lavender sachets in your closet will naturally repel moths without harsh chemicals. For longer storage, use a breathable cotton garment bag rather than plastic, which can trap moisture and lead to mildew.
Spot clean minor marks with a damp cloth and gentle wool wash rather than rushing to the dry cleaner. Professional cleaning is necessary only once or twice per season, as over-cleaning can break down wool fibers. Between wearings, air your coat outside for 30 minutes to refresh it naturally, Canadian winters make this easy.
Keep a small repair kit with matching thread, spare buttons, and seam sealant handy. Check buttonholes and pocket stress points periodically, reinforcing any loose stitches before they become bigger problems. A quick steam with your iron held above (never directly on) the fabric will remove wrinkles and restore the coat’s shape after storage.
Your handmade coat deserves the same attention to detail you gave during construction.
Common Questions About Sewing Burda Wool Coats
Are Burda patterns true to size?
Burda patterns typically run smaller than North American sizing and use European measurements, so always check the actual body measurements on the pattern envelope rather than relying on the size number. Most experienced sewists recommend making a muslin first to verify fit, especially for a garment as involved as a coat.
How much fabric do I actually need for a wool coat?
Most Burda coat patterns require 2.5 to 4 yards of 60-inch-wide wool fabric, depending on your size and the style’s length and complexity. Always buy an extra half yard to account for pattern matching, directional nap, or any cutting mistakes, wool coating is expensive, and running short mid-project is frustrating.
How long does it take to sew a wool coat from a Burda pattern?
Expect to spend 20 to 40 hours on a wool coat, spread over several days or weeks depending on your pace and experience level. The time includes pattern preparation, cutting, multiple fittings, careful pressing at each stage, and finishing work like bound buttonholes or hand-stitched hems.
Can a beginner tackle a Burda wool coat pattern?
While Burda’s instructions assume sewing knowledge, an ambitious beginner with solid garment construction basics can succeed if they choose a simpler style, work methodically, and don’t rush. Consider starting with a coat pattern labeled “easy” or “beginner-friendly” and practice techniques like welt pockets or bound buttonholes on scraps first.
These questions come up repeatedly in sewing communities because coat construction feels intimidating. The truth is, most challenges stem from not preparing properly or skipping the muslin stage. Once you understand Burda’s sizing quirks and give yourself permission to work slowly, the patterns themselves are well-drafted and logical. If you get stuck on a specific technique, search for video tutorials using the pattern number, countless sewists have documented their Burda coat journeys online, and the community is generous with troubleshooting advice. Don’t hesitate to pause, research, and practice before cutting into your beautiful wool.
Finishing your first handmade wool coat feels like crossing a threshold in your sewing journey. You’ve mastered complex techniques, wrestled with heavy fabric, and created something that will keep you warm for years to come. That’s not just a coat hanging in your closet, it’s proof of your skill, patience, and creative vision.
I still remember buttoning up my first Burda wool coat and feeling that surge of pride mixed with disbelief that I’d actually made something so substantial. Now I’d love to see yours. Share your finished Burda Wool Coat Creation Challenge project on social media or in sewing communities. Tag your photos, talk about what you learned, show off those perfect buttonholes you agonized over. Your story might be exactly what inspires another sewist to attempt their first coat.
Already thinking about your next project? Consider tackling a different Burda coat style, experimenting with pattern hacking to make this design uniquely yours, or trying new wool types you discovered during fabric shopping. Each coat you make builds your confidence and refines your technique.
The beauty of handmade outerwear isn’t just the garment itself, it’s the connection to a global community of makers who understand the work, celebrate the victories, and cheer each other through the challenging bits.